Goals in website promotion: all the rules for setting up in Google Analytics


Achieving a goal is great. The statement works both in life and when promoting sites. But it is always important to know exactly what goals are being pursued, otherwise the work loses all meaning. It is all the more strange that in Google Analytics you can still find “goalless” accounts or accounts with “pseudo goals” (for example, which track only the number of pages viewed and the duration of views). After all, the fact that people are interested in your site is wonderful in itself, but it loses all meaning if there is no final conversion, that is, a purchase / order of a service. Therefore, the targets must be configured correctly. How to do it - see below.
Subtleties of settings
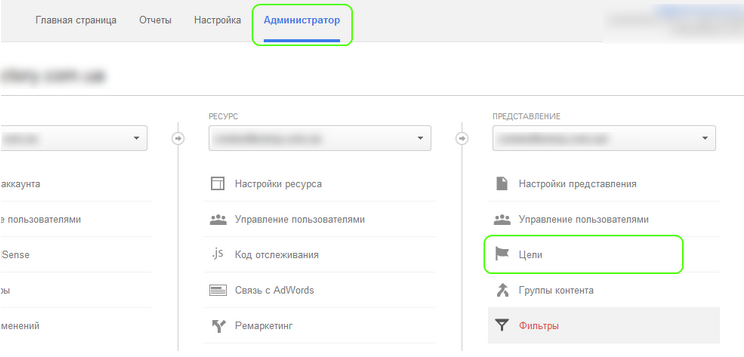
When submitting, immediately select "goal", then on the "administrator" tab you can open a window for setting goals. The preset goal templates are impractical. They can only be used to evaluate the technical capabilities of tracking different moments on the site. The best way to create your own goal is to use the Smart Goals feature. This is a special Google development that helps in optimizing your account. To set up smart goals, select one of the suggested items, and then save it.
Then you need to set up landing page tracking, where the target will be "landing page". Then you need to register the url without the domain. You can add the necessary link in three ways:
- equals – if the link completely matches the url of the tracked page during configuration. If there is a transition to a page with html, then the goal will not be fixed;
- starts with - in this case, the goal is considered achieved at any address;
- regular expressions: they can be used, for example, serial numbers of orders (numbers)
How to set up a sequence
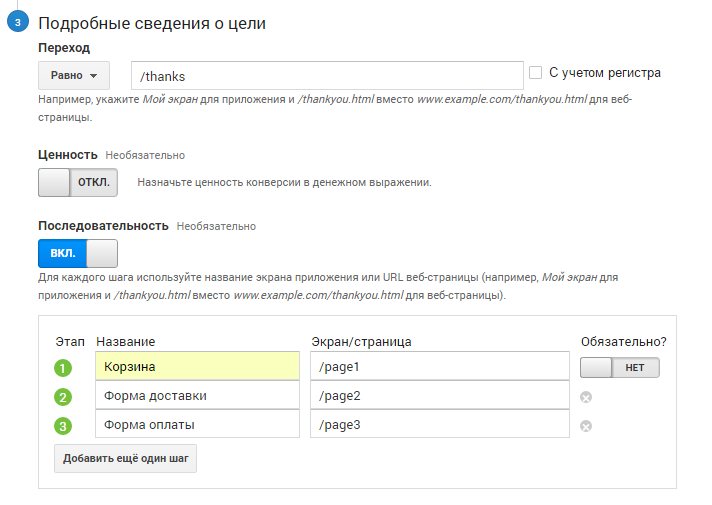
If step-by-step registration is provided, then each step will be a stage on the way to the goal. This is where goal sequence comes in handy. You will be able to go through all the stages of this sequence together with your customers and discover the very “funnel” through which potential customers “merge”.
The main points here are:
- in the field of the main url-address, specify the link to the last page in the algorithm of actions. Then the goal is counted even if the user did not go to any other pages except the last one;
- use "regular expressions" to customize;
- create the required url for your landing page if it doesn't already exist. To do this, the "pageview" tag is set in the Tag Manager.
How to track events?
Any user interaction with the site is already considered an event, but they always need to be properly tracked. For proper configuration, you need to use the admin panel and set the category and action in it. You can also set a label and value, but this is optional. During the setup process, you can use one of three matching options: equals, starts with, regular expression.
You can also additionally set the value (the monetary equivalent of one shipment in your particular case). But always keep in mind that one goal achieved by one user counts once.
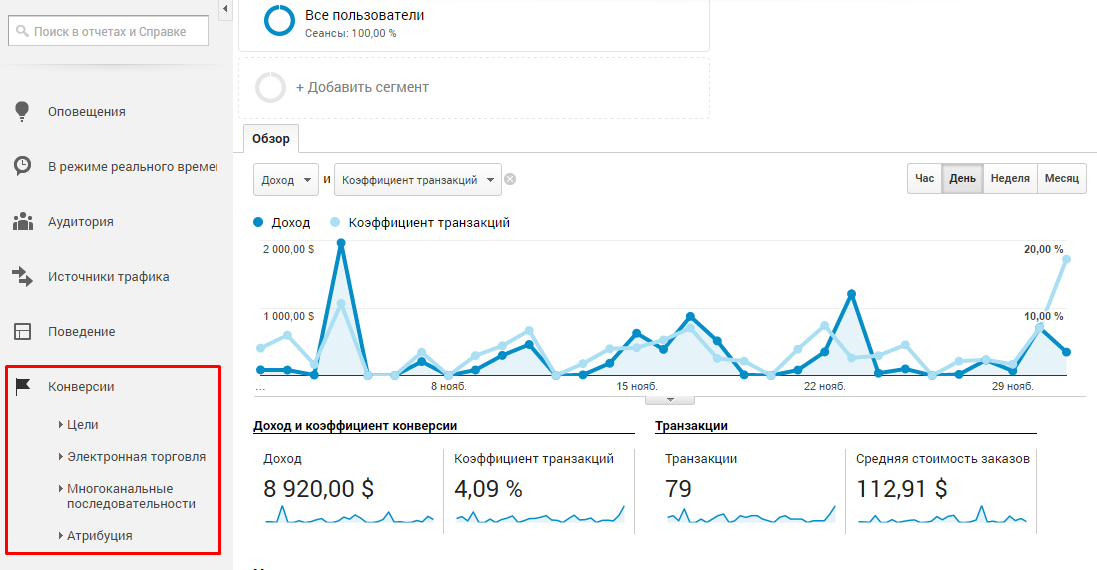
The biggest difficulty in setting up is that when the goal is reached, all data about this is transferred to Google Analytics. The ability to send by default is provided by special services such as Jivosite. If you want to make sure everything works as it should, use the behavioral report in the "events - top events" tab. If automatic submission does not occur, use the capabilities of Google Tag Manager. After the correct settings, the manager will record a click on the "buy" button with a certain class. The text you will follow is entered in the trigger settings. Then be sure to select what kind of event is sent to Analytics when the specified trigger is triggered.
You can also track using dataLayer if GTM does not work correctly on your site. In this case, the selected site elements are additionally assigned the dataLayer parameter, and when the necessary transaction is completed, this variable captures information about the event in JavaScript, after which the trigger fires. Several triggers can be configured on one dataLayer at once, after which you do not have to change the program code on the site each time.